Showing posts with label Savory Foods. Show all posts

Saturday, June 29, 2013

Mom's Potato Salad


Mom's Potato Salad ~ The perfect compliment to any summer meal!


I have fond & oh-so-wonderful memories of my Mom's potato salad! I remember helping her make this many, many times in our hot Southern California kitchen!! (No central air,... just an old swamp cooler that I fear only made us think that it was cooling down the house!) When I got older, I remember eating right after it was mixed up (Dishing ourselves a small bowl) with the warm potatoes and the cool pickles together in my mouth!! OHHH yummy!! I've made this recipe for my own family on many occasions and my oldest daughter and I both sneak our bites right after the mixing is done! In my opinion, it always tastes best at this time!


Ingredients:

1 - 10# bag of potatoes, boiled and peeled
1 dozen eggs, boiled, peeled and diced
1 - 15 oz. can sliced black olives, drained
1 - 2 oz jar diced pimento
1 - 16 oz jar sweet relish
2 cups mayonnaise
1/4 cup prepared mustard
2 Tb granulated or powdered onion
1 tsp granulated or powdered garlic
2 tsp salt

Directions:

(1) Cook your eggs and potatoes:

Peel potatoes and cut into 1" cubes. Boil until a fork easily pierces the cubes, being careful not to overcook as they will become mushy very quickly.

At the same time, hard boil the eggs. (Yolks will be completely cooked as opposed to 'soft-boiled' eggs) Once cooked, drain the hot water from the pan and fill it with cool water, allowing the eggs to set for a few minutes to cool down so they don't burn your fingers while trying to peel them. Once cooled enough to handle, peel and dice.

(2) Assemble everything in one giant bowl:

Once the potatoes and eggs are done, you can start putting everything together. My Mom had a huge Tupperware bowl that was light green in color. (I looked it up online and found a picture of a bowl like the one she used, the color was 'Spring Green'.) She always made her potato salad in this bowl. I can still remember it with its giant flexible lid (not green)... (Shown below)


This bowl was 12" across and appx 5 1/2" deep!!!

Place the 1" cubed potatoes and finely diced eggs in a giant bowl. Add the can of olives, drained. Next dump in the entire contents of each jar of pimento and relish. (You don't even have to start mixing it yet!)

Add the mayo and mustard right on top of everything, and try to sprinkle the onion, garlic and salt evenly over the surface of everything, just to make sure there are no clumps of spices later. (Nobody wants to bite into THAT MUCH flavor!!!!)

(3) Stir!! Stir until everything looks well distributed (mayo & mustard) and the potatoes look well coated. Don't forget to stir up from the bottom several times to get all those uncovered potatoes. Once it's completely mixed, it's time for a taste test. Some may want a bit more flavor. It's never exact since the bag of potatoes aren't always exactly 10 pounds. You may even feel its a bit dry... add more mayo, if you like. My Mom would always pour in some sweet pickle juice. Once she had it completely done, she would smooth the top and sprinkle paprika over the surface. I don't know if this was just an aesthetic thing, or a flavor thing... but she always did it as far back as I can remember.

Enjoy!!


Thursday, August 30, 2012

Sausage Stuffed Shells with Fresh Ricotta

Quick & easy weeknight meal.
This recipe can be duplicated by merely viewing the photos... nothing mysterious about it. But very tasty! I had made fresh Ricotta and wanted to try it in a savory dish instead of a dessert.

Ingredients:
1 pound Spicy/Hot Italian sausage, bulk
1 pound Mild Italian Sausage, bulk, recipe
1 box large pasta shells
1 recipe fresh Ricotta, recipe
12 ounces fresh marinara
Garnish with mozzarella and fresh Italian parsley


STEP 1: Start water to boil noodles. Once water has come to a boil, add pasta. I drizzle a bit of olive oil into the water to prevent the shells from sticking to each other. Boil for about 10 minutes, checking often for doneness.

STEP 2: As soon as you put your water on to boil, start cooking the sausage in a skillet. Break all the sausage into large pieces to help it break down, then as it continues to cook, continue breaking it up with a wooden spatula until the pieces are fairly small. Cook until no pink is seen and meat is done. Set aside.


STEP 3: When pasta is done, drain. Place several shells into a 9x13" baking dish. Add a spoonful of the cooked sausage and a generous dollop of fresh ricotta. Continue until shells/sausage are gone.


STEP 4: Preheat oven to 400*. Drizzle marinara over all shells and garnish with shredded mozzarella.


STEP 5: Heat in oven until mozzarella is melted and shells are heated through. After plating, garnish with Italian parsley.


Homemade Ricotta!

In July, my oldest daughter & I signed up for an online cheese-making class that would begin in August. (We were both so excited because we had been talking about making cheese for years. My daughter had made homemade buttermilk countless times for cooking, and we had heard about kindergarten classes 'shaking' their way to homemade butter (which we have not tried) but still we held back.

Fast forward a few years... One day my oldest son & his wife took my husband & I to dinner where this Italian restaurant featured their fresh, in-house, homemade mozzarella. (I had never heard of such a thing.) It was delicious! I was hooked! I was determined to make homemade cheese. If they could do it, so could we!

I'm sorry to say over a year passed since that dinner with our son. Then my daughter, Laurel, happened across this online cheese-making course. She loves all things relating to food, and even has an awesome food blog called California Laurel. It was while she was getting her daily 'fix'...(reading other folks recipes/blogs/etc.) that she came across this. Another blogger mentioned something about cheese-making. She discovered Cheesepalooza. It was, and I quote from her blog, a 'world-wide cheese-making class that would take place over the internet. Each month a new cheese would be attempted by the participants.' She told me about it & said she was signing up..."You want me to sign you up, too. Right?".  I didn't have all the details yet, but if I was going to learn how to make cheese by the time this was all over,... I'm in!

Our 'classroom' textbook & most
 recent love...

After signing up, the first thing we needed to do was buy our textbook: a beautiful cheese-making book written by Mary Karlin that I would have bought just to look through & drool over the photos! It's a beautiful book and the information in it is absolutely fantastic!


Next, I started reading the book itself, trying to understand a little more about the mysteries of cheese-making. Laurel had already gone ahead & made her first cheese, Ricotta, and posted some awesome recipe uses on her blog, including Baci di Ricotta, pictured here......


Baci di Ricotta photo property of CaliforniaLaurelblogspot.com
Baci di Ricotta, an Italian doughnut made mostly of deep-fried Ricotta
sprinkled with powdered sugar. Recipe here...

......and my favorite, a delicious & refreshing concoction that she didn't even bother to name but includes fresh slices of peach, pecans, fresh chopped basil all atop a piece of bread with a smidge of honey drizzled over the top. It was delicious! (Pictured below)

Fresh Ricotta Appetizer photo property of CalifornaiLaurel.blogspot.com
The complete recipe for this tempting dish can be found at California Laurel.

Almost waiting until the end of the month, for fear I hadn't yet read all I needed to read or would bungle this up somehow, I finally attempted to make my cheese....

I started yesterday, a bit late in the day. I was so nervous. I had thought about making cheese so often. I really wanted this to work out well, knowing that I am one of those people who gets defeated a little too quickly. Especially with something as daunting as cheese-making! But, in the end, all went well and I'm ready to start September's recipe! But first things first... let's make some Ricotta!

I found my citric acid in the canning section of my grocery store.
Ingredients:

1 gallon pasteurized whole cow's milk
1/2 cup heavy cream
1& 1/2 teaspoon citric acid powder
2 teaspoon kosher salt (Non-iodized), divided


Combine all ingredients into pot, except 1 teaspoon salt. Whisk to combine.
STEP 1: Heat the milk, heavy cream, citric acid and only 1 teaspoon of the salt in a non-reactive stock pot, on medium-low heat. Whisk thoroughly...

Use a rubber spatula to stir. Here I was just curious about how the curds were doing...

Heat to 185* to 195* F. This took me about 30 minutes.


I stirred this to try and capture a photo showing the separation
 of the curds & whey on the right. Sorry, I couldn't quite capture it. 

NOTE: My thermometer stopped working during the heating! I was told by a reliable source you can just "eye it"... watch for the curds starting to form and separate from the whey and the whey will become a 'yellowish-green color and just slightly cloudy'. As soon as you've seen these signs, remove from heat....


...Cover and allow the curds to sit, undisturbed, for 10 minutes.


I folded my cheesecloth over onto itself as many times as possible,
yet leaving it large enough to cover the strainer.

STEP 2: While waiting for the curds to start forming, and to reach the desired temperature, ready your draining equipment: Place your strainer over a large bowl, or bucket large enough to catch all the whey, and your cheesecloth folded over on itself to form a nice tight weave, placed over the strainer. Don't forget your skimmer (or ladle!).


I used a ladle since I don't own a skimmer.

STEP 3: Ladle everything from the pot, into the cheesecloth-covered strainer. (Don't forget to have a pot placed under your strainer to catch all the liquid, which is the whey and can be used as a starter for more cheese or it can be used in your compost pile! Check out this website for more details: http://homesteadingthebackforty.blogspot.com/2008/05/another-whey-to-fertilize.html)


Tie up the opposite corners to make a pouch for draining the cheese.

STEP 4: Tie up the four corners of the cheesecloth, starting with the two opposite corners first.....


..... Then tie up the remaining two corners, making a nice pouch.


I used the largest wooden spoon I own as a hanger to help strain the cheese.

STEP 5: I then allowed my cheese to drain for several hours, until it reached the consistency I wanted. I waited until my cheese was done draining and added the remaining salt. Here is the finished product.....


Tasting Notes:

Appearance: A bit wetter than store-bought Ricotta; medium-sized curds.
Nose: Very subtle
Overall Taste: VERY creamy and quite delicious!
Sweet to Salty: Sweet
Mild/Robust/Pungent: Extremely mild!
Mouth Feel: Thick and creamy... reminds me of cream cheese.

STEP 6: ENJOY! Make one of the previous delicious dishes featured by California Laurel (above) or try the following dish. Refrigerate any unused Ricotta in a non-reactive, lidded container.


Sausage Stuffed Shells with Fresh Ricotta, drizzled with Marinara.
Sausage Stuffed Shells with fresh Ricotta. Recipe here.


Tuesday, July 31, 2012

Homemade Breakfast Sausage, Ground

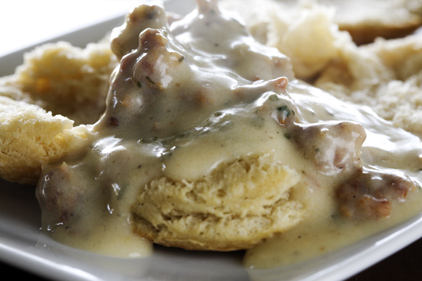
Nothing better than biscuits with sausage gravy!
My family loves to eat breakfast, no matter what time of day that happens to be! I've been making breakfast for dinner since I was first married over 27 years ago.

Now this doesn't mean we don't enjoy breakfast in the morning, because we do! It's just that we would eat 'breakfast' any time of the day,.. as long as it's what my family calls 'big breakfast'.

Allow me to explain. If I served my family oatmeal for dinner, they wouldn't think that's so cool. So understand that my family will eat breakfast for dinner, IF it includes meat, potatoes, eggs and maybe some kind of bread. So 'big breakfast' to my family might be pancakes with fried potatoes and bacon on the side. Or maybe omelettes with cheddar cheese & applesauce (my husbands' favorite) with fried ham and whole wheat toast. Or how about some crispy hash browns, with 2 fluffy biscuits opened on top and smothered in sausage gravy. Maybe with a couple over-easy eggs on top for good measure. Now THAT'S what my family calls 'big breakfast'!

So when the day arrived that I discovered I could make sausage at home, I naturally tried making some breakfast sausage. I looked online and found a few recipes that looked interesting. I'm using a recipe I found on allrecipes.com, but I changed the amounts of each of the spices, making it more to my liking. I think it's delicious. Hope you agree!

Ingredients:

2 1/2 pounds pork (Buy it already ground if you have no meat grinder)
2 Tbl dried sage
2 1/2 tsp salt
1 1/4 tsp ground black pepper
1/4 + 1/8 tsp dried marjoram
2 Tbl brown sugar
1 Tbl crushed red pepper flakes
1 pinch ground cloves

If you're using unground pork, follow the directions here.

*This recipe allows for the sausage to be eaten immediately, no need to let the spices cure with the meat overnight.

Saturday, July 28, 2012

Homemade Mild Italian Sausage

My husband bought me a Kitchen-Aid Stand Mixer a few years back and for the next few special occasions, he gifted me with special attachments that don't come with the original mixer. One such gift: a meat grinder! I must admit I didn't use it right away & never actually thought of using it to make sausage.

As a child, I remember my Mom using a meat grinder that she attached to our pull-out bread board, which she had to crank by hand. She used it to grind larger cuts of meat into its' ground version for meatloaf, etc. Now since I can buy meat already ground, my meat grinder attachment gift sat unused for a while.... until I saw an online recipe by Emeril Lagasse, showcasing his homemade Mild Italian Sausage recipe. So we tried it out & I can't say enough how easy, inexpensive & rewarding it is to grind your own sausage! It's so easy I don't really feel like I'm doing any work....ya know, like 'extra credit'. (Spongebob - Season 2/Episode 10 "No Free Rides". hehe)

So, back to the sausage....

Emerils Mild Italian Sausage (http://www.foodnetwork.com/recipes/emeril-lagasse/homemade-mild-italian-sausage-recipe/index.html)

Ingredients you'll need:

3 pounds well-marbled pork butt (Buy ground pork if you don't own a meat grinder)
2 Tbl minced garlic
1 Tbl + 1 1/2 tsp paprika
1 1/2 tsp toasted fennel seeds*
1 Tbl salt
1 Tbl freshly cracked black pepper
1 tsp cayenne
1/2 tsp ground anise* (Anise is simply ground fennel seeds)
2 Tbl freshly chopped Italian parsley
3 Tbl dry red wine (I used balsalmic vinegar)
Pork casings, optional (I just bagged mine since I would use mine like ground beef.)

If your fennel seeds (found in the spice section at the supermarket) aren't toasted, simply measure what you'll need and 'place whole spices in a sauté pan, preferably non-stick, over medium-high heat and cook, stirring, until fragrant, about 5 minutes'. (This tip from Bon Appetit:  http://www.bonappetit.com/tipstools/tips/2008/04/how_to_toast_spices#ixzz21xmrNtxr)

STEP 1: Cut meat into small cubes. Combine meat and all remaining ingredients in a large bowl. Toss to coat. Cover and refrigerate overnight or up to 24 hours.

I had purchased a 13 pound Pork Loin from Costco. (Instead of Pork Butt,
which the recipe calls for)
I sliced off what would be pork chops, then cut that even smaller into cubes.
Here the meat is all cubed and ready for the spices!
I added the remaining ingredients and tossed the meat to get a good coating
 on all of it; then covered & placed in 'fridge.
STEP 2: Pass meat through meat grinder.

Always use the tool provided to push the meat down into the tube.

Here is the meat as it passes through the grinder for the first time.

If the pieces aren't small enough, pass them through the grinder a second time.


STEP 3: Time for a taste-test! Fry up a few teaspoons to check for a satisfactory flavor. (If your pork was pretty lean you may have to add a tiny bit of oil to fry the meat in.) Adjust the seasonings as desired. I thought it tasted awesome the first time and didn't change a thing!


Frying up a little for my first taste of homemade sausage!

I wrote the necessary information on my bags and scooped out some into each.

I then weighed them and either added more or took some out so that I ended up with several 1 pound packs.
I had divided my meat into three pieces before I started. I then made 1/3 Mild Italian, 1/3 Spicy Italian and 1/3 Breakfast Sausage.
*Like to try my Breakfast Sausage Recipe? click here