Showing posts with label Crafts. Show all posts

Tuesday, October 14, 2014

Princess Crown

'Princess' Genevieve Fey wearing her crown for the first time!
With Princess parties being so popular right now, this little craft can make it a little more personalized and special for your little 'Princess'!

This original idea came from a Pinterest pin which used a fabric doilie, cut in half, and stiffened in a circular shape, followed by spray paint and embellishments.

This simple crown is a take on that, and I can take no credit for any of it! My daughter-in-law, Brenda, was throwing my two granddaughters a combined princess party, (They have birthdays on the 10th & 13th of the same month!) and she needed a crown for her 3 year old. She designed and made the complete crown.

Genevieve Fey loves Anna from Frozen, and to complete her outfit she needed a crown but all the crowns available are usually silver, so Brenda made her this adorable crown using inexpensive and readily available supplies.

Supplies:

3" wide lacy-looking stiff ribbon (We found ours at Joann Craft & it feels like wire)
gold spray paint
embellishments (Buttons, antique jewelry, pearls, etc)

We had many choices, but ended up using what's on the roll...
Here Brenda is trimming off what she doesn't want... shaping it into a 'crown'...  
Since Brenda used the stiff 'lace' there was no need to stiffen it when she was done trimming. After she trimmed it to the shape she wanted, she spray painted it gold.

When dry, she added the embellishments that she felt matched Genevieve's dress. The hot pink and blue 'jewels' were star-shaped sequins that Brenda cut to a 'gem' shape! (Cheap & easy!!)

DONE!!! She just used regular bobby pins to attach it to Genevieve's head.

Saturday, February 8, 2014

Valentine's Day Shadow Box

My daughter made this for her husband this year for Valentine's Day....so he hasn't received it yet. She showed it to me and I thought it was so clever, I wanted to blog about it. It's inexpensive, quick, VERY personal and it also lasts all year long!!

Items needed:

~ 9x11" Shadow box

~  Scrapbook Paper of your choice

Directions:

(1) After opening shadow box and removing background piece, cut paper to size for the background. Before attaching anything permanently, fool around with the papers and embellishments to make sure you're satisfied with the final product. Decide on the size and color of the paper for the 'I love you because" banner when arranging the other items...just to make sure you love it!! You want to make sure this is the first thing your eye is drawn to when looking at the box.

My daughter used paper that looks like a love letter directly behind the banner (left), and also matted it on the red paper to make it stand out. (Good idea)  The birds (bottom right) were cut from another paper and placed in front of the striped background paper.

If you're planning to add embellishments at the front of the box (like the butterfly, top right, and the card with birds, bottom left) prepare those at this time also, rearranging everything until it looks the way you'd like.

(2) Attach all papers and embellishments. Slide the close-up embellishments between the glass and the inside lip of the frame. (They end up looking as if you slid them into the frame edge, but they are actually inside the glass where they can't be moved.) Close up box.

(3) Using an erasable-on-glass marker (Sharpie was used here. It comes off with Windex), write across the front of the glass the first "I love you because" reason... Of course, as seen in the photo, my daughter wrote "You buy me flowers". (He does buy her flowers all the time...) The beauty of this gift is that it can be erased monthly, weekly or even daily, however often you'd like, and a new 'reason' can be written..."You're a great  Daddy", "You're a hard worker", ""You pick up your own socks!"...or funny stuff that you DO appreciate: "You don't make weird noises when we have company" or "You don't lift up your shirt & scratch your belly in public"....and on and on. Have fun with this one & have a Happy Valentine's Day!!

This picture shows how the 'reason' is written across the front of the glass,
making it possible to change as frequently as desired.

Sweet....


Tuesday, August 28, 2012

Photo Tile Coasters


Photo tiles with black and white photos
Quick & easy project to give as gifts or keep for your own~

I know this idea has been around for a while, but it's my first time to try it out. My son and his wife gave us our first grand-daughter this past fall. They had also just purchased their first home. I thought it would be ideal to make them a set of tile coasters with pics of their beautiful baby girl.... to protect their new furniture. They were planning to go with black & white for a majority of the living space, with a few different shades of pale greens for a bit of color. I thought the black & white photos would look great!

Supplies:

A set of 4"x 4" white ceramic tiles.

Black & white photos cut to fit on tiles

Mod Podge, Hard Coat

Sponge paintbrush

Felt or cork to protect the bottom

STEP 1: Make sure your tiles are free of dirt or any oils. Using Mod Podge, apply the photos to the tiles, according to manufacturers instructions, being careful to center them on the tiles. Allow to dry overnight.

STEP 2: For my tiles, I was going with the black and white theme so just carried that over by painting a black line around the outside edges of each of the tiles. Once dry, I sprayed 2-3 coats of an acrylic sealer. Allow to dry between coats.

STEP 3: Hot glue a matching square of felt or cork to the bottom of each tile to protect your furniture from any possible scratches the tile might make. I chose a felt bottom.


I used some felt that went with my black and white theme...


...then I just hot-glued the felt to the underside of each tile...

Lastly, I painted the date each photo was taken on its' edge,
just because I know I'll never remember!


For another tile coaster idea using napkins, click here.

Monday, August 27, 2012

Chunky Board Book ~ Personalized

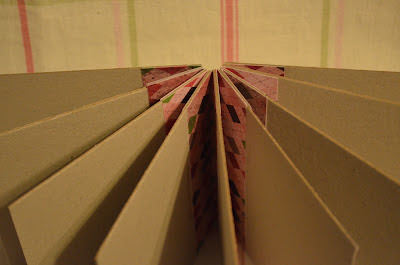
Closeup of board book binding.
Making a Chunky Board Book at home is quick & easy!
With five grandchildren around, it seems we've purchased countless numbers of board books. Some for a few coins, others a bit more pricey, but all guaranteed to bring smiles to little faces. Babies love them since they are so easy to hold and maneuver, and the brightly colored pictures can keep their attention for quite a while and have them coming back over and over just to look at the very same pictures!


Package of 30 sheets chipboard from JoAnn Fabrics.
I found this package of chipboard at JoAnn Fabrics with 30 sheets!

Supplies:  

Chipboard, for the pages.

Scrapbook Paper,  2 sheets of 12x12". One for the 'binding strips' that go between each page and one for the outside cover of the book.

Mod Podge, Matte

Square chipboard pieces, 3x3".

STEP 1: For the 'pages', I cut one sheet of chipboard into 9 squares, each ending up a 3"x3" square.

The first 12x12 paper I cut into 'binding' pieces.
STEP 2: I chose a piece of paper for my 'binding strips'. I cut one piece to go between each piece of chipboard. This means I needed 8 total pieces. Each piece was a strip of paper that was 3" tall and 2" wide.

I folded the pieces in half, lengthwise.
STEP 3: I folded all the 'binding strips' in half lengthwise......


..... then applied glue to only half of the strip....


...and attached this to the piece of chipboard that I planned to be my first page....


.... after about 30 seconds, I applied glue to the other half of the paper and laid the next piece of chipboard onto it, making sure it lined up. Once dry I stood it up for this photo.


STEP 4: I continued doing this with the rest of the chipboard 'pages' and paper 'binding strips'. Trim any edge pieces that hang over too far, so that you end up with a nice, clean, even edge.,,,


... then I cut the corner tips off on every page, but this isn't necessary. (I actually trimmed mine at the end, but meant to do it at this point. But either time is fine.)


STEP 5: Next I cut a 3"x1" strip of chipboard to help reinforce the back binding.


.... I applied glue to the back of the binding, or spine...


...then I added the chipboard piece and then I let that dry for 1/2 hour.


STEP 6: While waiting for the spine to dry,  I took my second piece of paper and trimmed it down to fit into my printer. (8 1/2" x 11")...


... after deciding on a title for my 'book', I ran it through my printer, ...


... then I cut it down for the outside cover of the book...


...making sure to cut the paper a little bit bigger than the actual book size... (I trimmed mine a little too much on the left & right..I should have left a little more for folding inside.)


STEP 7: Apply glue to the outside of the book; the front, back and spine. (The extra, over-lapping paper will be folded over into the inside once the outside has dried.) Once that dries...


... glue the over-lapping paper to the inside of the book.


Ta-Da! All done! Now comes the fun part of adding your pictures to the inside! Mine will be filled with pictures of our family members, with their names, to help my grand-daughter to learn who's who in our family!

Friday, February 24, 2012

Doll Bed for Barbie-sized Dolls: A Childs Craft

When I was a little girl I felt compelled to give my dolls all the comforts of a real home. So when I first saw this idea I knew I had to make it! I was still young and the idea was in a library book about mice. They talked, and lived just like humans, of course. They made their furniture from discarded things they 'collected' from the humans... and they made this bed in the book.

I thought it was pretty cool & a fabulous idea. My Mom helped me to make the bed & later she surprised me with bedding: a mattress, a quilt and a bedspread with two matching pillows! I loved them & yes!.. I still have them. Maybe I'll dig them out soon and post a few pictures. In the meantime, let's get started!

Items needed:

4 pencils
4 thread spools of the same size
1 empty cereal box

Pencils @ 12 for $1 from the Dollar Store!

STEP 1:
Cut off the top, bottom & sides from a cereal box. Glue the two pieces
together with the plain side out. 

STEP 2:
After the glue has dried, use a hole punch on each of the four corners.


STEP 3:
Choose four spools of the same size. Insert pencils.

STEP 4:
Slide pencil up from the bottom, through the holes.


All Occasion Letter Blocks

One of the greetings I used in December.
These types of blocks have been around for several years, so they may not be a new idea, but they sure are worth making! They're a great way to draw attention to a special day, a special person or just a special sentiment. They can spell out over 80 phrases/greetings and can be used for any occasion. If this isn't your style, choose a different base color for your blocks (I've seen it done in black with primary colors for the lettering) and possibly a different font for your letters. Decide which room you'd like them in and go with that style and color scheme. These work well on shelves, counters and even the fireplace mantle. They can also be set on a table when decorating for a special occasion such as a birthday party or baby shower.

These were for Valentines Day.

Materials List:

16 wooden blocks, 2 3/4 inches

Craft paint for base, and four colors for letters

Alphabet stencils, 2 inch

Stencil brush

Tack cloth

Brown craft paper for homemade heart and clover stencils

Medium color wood stain (for weathered look)

STEP 1: Sand all sharp edges off of the blocks to give the blocks 'softer' corners. This step can be eliminated if a more modern and crisp look is desired. Use your tack cloth to remove any sawdust created by the sanding.

STEP 2: Paint your blocks with the base color you've chosen. Apply 2 to 3 coats on all sides to ensure even and complete coverage.

STEP 3: This step is important and will actually be helpful later when using the blocks. Choose the side of each block that will be the bottom and number them on the bottom from 1 to 16. Your stencils can be used for this step if you would like to use the numbers along with your letter blocks later. Otherwise you can simply use a sharpie marker.

STEP 4: Following the chart below, and using your letter stencils and stencil brush, start with one color and do all the blocks that will have that color, making sure the correct letters are on the correct numbered block.

EXAMPLE: The block that you numbered with a 1 on it earlier will now get a yellow N, a yellow D, a yellow H and a yellow E. Then find the block that you put a 4 on the bottom, and on its' sides put a yellow Q, A, I and 4, one letter per each block side, and so on...according to the chart below.

Painting Chart:
Yellow: Block #1: N, D, H, E. Block #4: Q, A, I, 4.
Block #9: A, B, C, D. Block #13: S, O, A, C.

Red: Block #2: E, I, P, heart. Block #3: M, P, G, &.
Block #6: L, A, W, S. Block #16: F, I, K, M.

Blue: Block #8: V, O, H, R. Block #11: H, E, L, R.
Block #12: S, D, N, W. Block #15: T, V, U, O.

Green: Block #5: L, O, R, E. Block #7: E, T, J, clover.
Block #10: Y, G, C, E. Block #14: T, N, W, Y

For the style of the blocks seen in the photos above, lightly sand fronts and edges of each block after letters have dried. Wipe with a tack cloth. Wipe a light coat of wood-stain over all six surfaces of each block, immediately wiping any excess off. Allow to dry according to wood-stain manufacturers' directions. The stain isn't necessary but will give the blocks a more rustic & weathered look, if desired.
The following two messy pages are my original scribblings... showing what can be written with the blocks. Just find the block with the corresponding number and use the letter it lists.


Saturday, February 11, 2012

Napkin Rings for Valentines Day

Easy 'Conversation Hearts' napkin ring....
While recently shopping at Cost Plus, my husband and I purchased some red plates and bowls....just two of each, for the two of us. (Ya know,..for romantic meals) I picked out some different cloth napkins to go with them but couldn't find any napkin rings especially for Valentines Day.

I gave it some thought. What could I do that would be quick and easy...and fun? (not to mention cute & inexpensive) Well, the following is what I came up with...

What you'll need:

Plastic shower curtain rings. (I got these @ Target, 12 for under $1.50)
Hearts for decorating the rings. (I found these in the Dollar Spot @ Target)
Glue gun
Red Sharpie marker

STEP 1: The first thing I did was tear out the red ribbon that was attached to each heart.


STEP 2: Next I used the Sharpie marker to write sayings you might find on a conversation heart.


STEP 3: Now I hot-glued a bead to the top of each heart, to cover up the hole left there.


STEP 4: Lastly, I hot-glued the hearts to each shower ring. I divided mine up since there were only a few green and blue hearts. I didn't want to end up with, say, all pink hearts at the end.


Thursday, February 9, 2012

Cake Stands: DIY

 
The cupcake motif was cut from a napkin & Mod Podged on.


Of all the great finds out there.... this has to be one of my favorites! The supplies are so inexpensive yet the end result is fabulous!! I found this idea on Pinterest and I'm sorry to say the link is no longer available! I had saved the original pic I viewed, so there's that, at least.


This is the original picture I saw on Pinterest.

STEP 1: Purchase clay pots and saucers.

STEP 2: Glue together. (I used Gorilla glue....but next time I will try out E-6000. I've seen it used on numerous other craft websites...and the Gorilla glue expands.)

STEP 3: Once dry, paint the whole thing. I used spray paint for some of mine and craft paint for others.

Just paper in the dish with a ribbon around the edge.

STEP 4: Embellish!!! I used scrapbooking paper on some of mine, ribbon on others,...then there were beads, lace, sequins, cut-outs and I even just did a little painting on some. Just do something fun! (I used Mod Podge to attach all of my embellishments.)

Paper in dish with some ric-rac on the edge.

Paper doilie attached with Mod Podge in the dish. The chocolate
cupcakes are pincushions and in the foreground
are tile coasters with a cupcake motif.


STEP 5: Once dry, spray with a finish to protect your paint and embellishments.


Paper in dish, then I painted some snowflakes on the rim.
The poinsetta paper makes a cute Christmas theme.


Painted red inside & up over the lip of the dish, then added  snowflakes.
Another cute dish for a Christmas party!


STEP 6: Cut out a circle of felt and glue it to the bottom of the cake stand to protect any surface it may be set on.
Paper inside dish then with a ribbon and silk flowers
attached to the front with Mod Podge.
Fabric doilie glued into dish with Mod Podge.

Paper in dish with cut-out words from same scrapbook design.
Then I just painted on multi-colored dots.
Paper in dish with same circles cut out and added to base.

My daughter found this mug a few years ago (Target... I think)
I decided to try to paint the same design onto a large cake plate.