Thursday, August 30, 2012

Sausage Stuffed Shells with Fresh Ricotta

Quick & easy weeknight meal.
This recipe can be duplicated by merely viewing the photos... nothing mysterious about it. But very tasty! I had made fresh Ricotta and wanted to try it in a savory dish instead of a dessert.

Ingredients:
1 pound Spicy/Hot Italian sausage, bulk
1 pound Mild Italian Sausage, bulk, recipe
1 box large pasta shells
1 recipe fresh Ricotta, recipe
12 ounces fresh marinara
Garnish with mozzarella and fresh Italian parsley


STEP 1: Start water to boil noodles. Once water has come to a boil, add pasta. I drizzle a bit of olive oil into the water to prevent the shells from sticking to each other. Boil for about 10 minutes, checking often for doneness.

STEP 2: As soon as you put your water on to boil, start cooking the sausage in a skillet. Break all the sausage into large pieces to help it break down, then as it continues to cook, continue breaking it up with a wooden spatula until the pieces are fairly small. Cook until no pink is seen and meat is done. Set aside.


STEP 3: When pasta is done, drain. Place several shells into a 9x13" baking dish. Add a spoonful of the cooked sausage and a generous dollop of fresh ricotta. Continue until shells/sausage are gone.


STEP 4: Preheat oven to 400*. Drizzle marinara over all shells and garnish with shredded mozzarella.


STEP 5: Heat in oven until mozzarella is melted and shells are heated through. After plating, garnish with Italian parsley.


Homemade Ricotta!

In July, my oldest daughter & I signed up for an online cheese-making class that would begin in August. (We were both so excited because we had been talking about making cheese for years. My daughter had made homemade buttermilk countless times for cooking, and we had heard about kindergarten classes 'shaking' their way to homemade butter (which we have not tried) but still we held back.

Fast forward a few years... One day my oldest son & his wife took my husband & I to dinner where this Italian restaurant featured their fresh, in-house, homemade mozzarella. (I had never heard of such a thing.) It was delicious! I was hooked! I was determined to make homemade cheese. If they could do it, so could we!

I'm sorry to say over a year passed since that dinner with our son. Then my daughter, Laurel, happened across this online cheese-making course. She loves all things relating to food, and even has an awesome food blog called California Laurel. It was while she was getting her daily 'fix'...(reading other folks recipes/blogs/etc.) that she came across this. Another blogger mentioned something about cheese-making. She discovered Cheesepalooza. It was, and I quote from her blog, a 'world-wide cheese-making class that would take place over the internet. Each month a new cheese would be attempted by the participants.' She told me about it & said she was signing up..."You want me to sign you up, too. Right?".  I didn't have all the details yet, but if I was going to learn how to make cheese by the time this was all over,... I'm in!

Our 'classroom' textbook & most
 recent love...

After signing up, the first thing we needed to do was buy our textbook: a beautiful cheese-making book written by Mary Karlin that I would have bought just to look through & drool over the photos! It's a beautiful book and the information in it is absolutely fantastic!


Next, I started reading the book itself, trying to understand a little more about the mysteries of cheese-making. Laurel had already gone ahead & made her first cheese, Ricotta, and posted some awesome recipe uses on her blog, including Baci di Ricotta, pictured here......


Baci di Ricotta photo property of CaliforniaLaurelblogspot.com
Baci di Ricotta, an Italian doughnut made mostly of deep-fried Ricotta
sprinkled with powdered sugar. Recipe here...

......and my favorite, a delicious & refreshing concoction that she didn't even bother to name but includes fresh slices of peach, pecans, fresh chopped basil all atop a piece of bread with a smidge of honey drizzled over the top. It was delicious! (Pictured below)

Fresh Ricotta Appetizer photo property of CalifornaiLaurel.blogspot.com
The complete recipe for this tempting dish can be found at California Laurel.

Almost waiting until the end of the month, for fear I hadn't yet read all I needed to read or would bungle this up somehow, I finally attempted to make my cheese....

I started yesterday, a bit late in the day. I was so nervous. I had thought about making cheese so often. I really wanted this to work out well, knowing that I am one of those people who gets defeated a little too quickly. Especially with something as daunting as cheese-making! But, in the end, all went well and I'm ready to start September's recipe! But first things first... let's make some Ricotta!

I found my citric acid in the canning section of my grocery store.
Ingredients:

1 gallon pasteurized whole cow's milk
1/2 cup heavy cream
1& 1/2 teaspoon citric acid powder
2 teaspoon kosher salt (Non-iodized), divided


Combine all ingredients into pot, except 1 teaspoon salt. Whisk to combine.
STEP 1: Heat the milk, heavy cream, citric acid and only 1 teaspoon of the salt in a non-reactive stock pot, on medium-low heat. Whisk thoroughly...

Use a rubber spatula to stir. Here I was just curious about how the curds were doing...

Heat to 185* to 195* F. This took me about 30 minutes.


I stirred this to try and capture a photo showing the separation
 of the curds & whey on the right. Sorry, I couldn't quite capture it. 

NOTE: My thermometer stopped working during the heating! I was told by a reliable source you can just "eye it"... watch for the curds starting to form and separate from the whey and the whey will become a 'yellowish-green color and just slightly cloudy'. As soon as you've seen these signs, remove from heat....


...Cover and allow the curds to sit, undisturbed, for 10 minutes.


I folded my cheesecloth over onto itself as many times as possible,
yet leaving it large enough to cover the strainer.

STEP 2: While waiting for the curds to start forming, and to reach the desired temperature, ready your draining equipment: Place your strainer over a large bowl, or bucket large enough to catch all the whey, and your cheesecloth folded over on itself to form a nice tight weave, placed over the strainer. Don't forget your skimmer (or ladle!).


I used a ladle since I don't own a skimmer.

STEP 3: Ladle everything from the pot, into the cheesecloth-covered strainer. (Don't forget to have a pot placed under your strainer to catch all the liquid, which is the whey and can be used as a starter for more cheese or it can be used in your compost pile! Check out this website for more details: http://homesteadingthebackforty.blogspot.com/2008/05/another-whey-to-fertilize.html)


Tie up the opposite corners to make a pouch for draining the cheese.

STEP 4: Tie up the four corners of the cheesecloth, starting with the two opposite corners first.....


..... Then tie up the remaining two corners, making a nice pouch.


I used the largest wooden spoon I own as a hanger to help strain the cheese.

STEP 5: I then allowed my cheese to drain for several hours, until it reached the consistency I wanted. I waited until my cheese was done draining and added the remaining salt. Here is the finished product.....


Tasting Notes:

Appearance: A bit wetter than store-bought Ricotta; medium-sized curds.
Nose: Very subtle
Overall Taste: VERY creamy and quite delicious!
Sweet to Salty: Sweet
Mild/Robust/Pungent: Extremely mild!
Mouth Feel: Thick and creamy... reminds me of cream cheese.

STEP 6: ENJOY! Make one of the previous delicious dishes featured by California Laurel (above) or try the following dish. Refrigerate any unused Ricotta in a non-reactive, lidded container.


Sausage Stuffed Shells with Fresh Ricotta, drizzled with Marinara.
Sausage Stuffed Shells with fresh Ricotta. Recipe here.


Wednesday, August 29, 2012

Homemade Butterfinger Candy

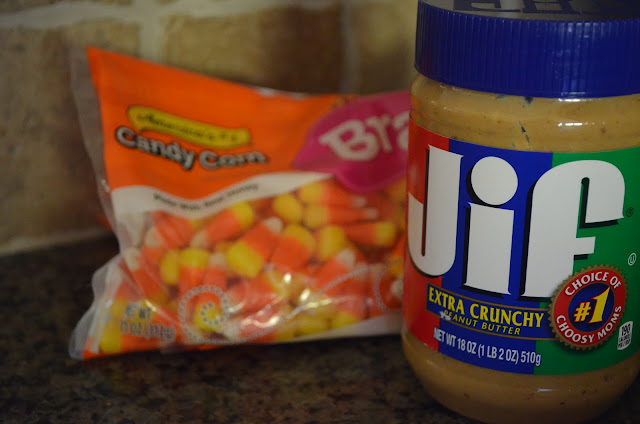
Candy Corn and Peanut Butter
Homemade Butterfinger takes just a
few simple ingredients!

In my never-ending quest for candy recipes, I was delighted to come across this one for Butterfinger,  & knew I had to try it! (Another Pinterest find!)  It only takes a few ingredients and was actually pretty easy. I didn't use the same chocolate as the original recipe because I prefer a mix of my own.... but basically it's the same recipe.


Ingredients:

2 1/2 cups candy corns (16 oz. bag)

1 cup crunchy peanut butter

1 cup semi-sweet morsels

1 cup milk chocolate morsels

STEP 1: Melt candy corn in a glass bowl at 30 second intervals, stirring after each, until completely melted.

STEP 2: Add in peanut butter. Mix thoroughly.


Homemade Butterfinger center
The candy centers, as they cool.

  STEP 3: Pour into a prepared 8"x8" pan, lined with foil and sprayed with a non-stick cooking spray, like Pam.


Homemade Butterfinger centers cut
Cut into longer bars or just into bite-sized pieces.
STEP 4: Allow to cool to room temperature. Once cool, cut into bars or bite-size pieces. Refrigerate in a ziplock bag for 2 hours, or until cold and firm.

STEP 5: Microwave 1/2 cup semi-sweet & 1/2 cup milk chocolate morsels in a glass bowl, for 30-second intervals, until melted. Stirring after each 30 second interval.

STEP 6: Prepare your dipping area: Place a sheet of waxed paper or parchment paper on a cookie sheet. Get out your candy centers that were placed in the refrigerator. Bring your bowl of hot, melted morsels to your dipping area, along with 2 dinner forks. (Yes, dinner forks!)


just dipped chocolate covered Butterfinger candy
Just dipped Butterfinger candies...not quite dry!
STEP 7: Working quickly, drop your first candy center into the bowl of melted chocolate. Using a fork, flip the candy over to coat other side. If any candy is still exposed, use your fork to push some chocolate over the exposed areas. Obviously, any area not covered with chocolate now, won’t be covered later. I use two forks now, and once I have lifted the candy up with my right fork, I gently tap that fork on the side of the bowl to help any dripping chocolate to fall back into the bowl, and I then go to place the candy on the parchment or waxed-paper covered tray, using my left fork to help to slide it off, trying not to damage the chocolates’ surface too much. (To view photos of this method, click here.)

*This is not a professional approach to candy dipping, by any means. There are candy-dipping ‘forks’ and other useful utensils available at most craft stores. For technique, you may want to peruse some websites that have step-by-step photos or even a video. I use this method because the Internet was not around when I first started making candy! I gleaned what I could from every book, article and recipe and came up with this method, which works for me.


Open Butterfinger candy, homemade.
All finished & ready to eat!
STEP 8: Continue working until all candies are coated with chocolate. If your candy centers start to seem a bit soft, just place them back in the refrigerator, or only take a few out at a time. Again, remember to work quickly since your chocolate is easiest to work with when warm and will become harder and harder to work with as it cools down. If your chocolate does become too hard to work with, simply reheat at 30 second intervals. One or two 30-second zaps should be all that’s necessary. Once your chocolate supply seems too shallow in your bowl, use the remaining morsels, melt in microwave & continue to coat the remaining candies.

STEP 9: Let cool in refrigerator, or if you’re in a hurry, the freezer works great! Once your chocolate has set, remove from tray and place in an air-tight container. I like to place small pieces of waxed paper between each candy. I then place them back in the refrigerator. 

ENJOY!

Interested in other Homemade candy recipes? Click here to try Twix or Peppermint Patties.

Tuesday, August 28, 2012

Photo Tile Coasters


Photo tiles with black and white photos
Quick & easy project to give as gifts or keep for your own~

I know this idea has been around for a while, but it's my first time to try it out. My son and his wife gave us our first grand-daughter this past fall. They had also just purchased their first home. I thought it would be ideal to make them a set of tile coasters with pics of their beautiful baby girl.... to protect their new furniture. They were planning to go with black & white for a majority of the living space, with a few different shades of pale greens for a bit of color. I thought the black & white photos would look great!

Supplies:

A set of 4"x 4" white ceramic tiles.

Black & white photos cut to fit on tiles

Mod Podge, Hard Coat

Sponge paintbrush

Felt or cork to protect the bottom

STEP 1: Make sure your tiles are free of dirt or any oils. Using Mod Podge, apply the photos to the tiles, according to manufacturers instructions, being careful to center them on the tiles. Allow to dry overnight.

STEP 2: For my tiles, I was going with the black and white theme so just carried that over by painting a black line around the outside edges of each of the tiles. Once dry, I sprayed 2-3 coats of an acrylic sealer. Allow to dry between coats.

STEP 3: Hot glue a matching square of felt or cork to the bottom of each tile to protect your furniture from any possible scratches the tile might make. I chose a felt bottom.


I used some felt that went with my black and white theme...


...then I just hot-glued the felt to the underside of each tile...

Lastly, I painted the date each photo was taken on its' edge,
just because I know I'll never remember!


For another tile coaster idea using napkins, click here.

Monday, August 27, 2012

Chunky Board Book ~ Personalized

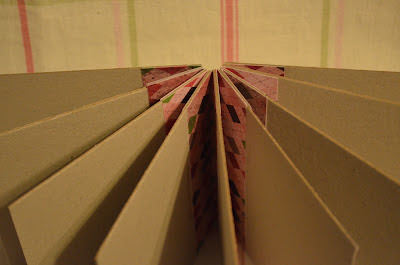
Closeup of board book binding.
Making a Chunky Board Book at home is quick & easy!
With five grandchildren around, it seems we've purchased countless numbers of board books. Some for a few coins, others a bit more pricey, but all guaranteed to bring smiles to little faces. Babies love them since they are so easy to hold and maneuver, and the brightly colored pictures can keep their attention for quite a while and have them coming back over and over just to look at the very same pictures!


Package of 30 sheets chipboard from JoAnn Fabrics.
I found this package of chipboard at JoAnn Fabrics with 30 sheets!

Supplies:  

Chipboard, for the pages.

Scrapbook Paper,  2 sheets of 12x12". One for the 'binding strips' that go between each page and one for the outside cover of the book.

Mod Podge, Matte

Square chipboard pieces, 3x3".

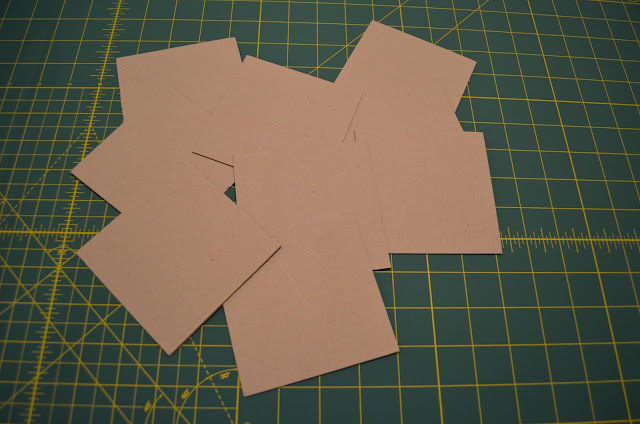
STEP 1: For the 'pages', I cut one sheet of chipboard into 9 squares, each ending up a 3"x3" square.

The first 12x12 paper I cut into 'binding' pieces.
STEP 2: I chose a piece of paper for my 'binding strips'. I cut one piece to go between each piece of chipboard. This means I needed 8 total pieces. Each piece was a strip of paper that was 3" tall and 2" wide.

I folded the pieces in half, lengthwise.
STEP 3: I folded all the 'binding strips' in half lengthwise......


..... then applied glue to only half of the strip....


...and attached this to the piece of chipboard that I planned to be my first page....


.... after about 30 seconds, I applied glue to the other half of the paper and laid the next piece of chipboard onto it, making sure it lined up. Once dry I stood it up for this photo.


STEP 4: I continued doing this with the rest of the chipboard 'pages' and paper 'binding strips'. Trim any edge pieces that hang over too far, so that you end up with a nice, clean, even edge.,,,


... then I cut the corner tips off on every page, but this isn't necessary. (I actually trimmed mine at the end, but meant to do it at this point. But either time is fine.)


STEP 5: Next I cut a 3"x1" strip of chipboard to help reinforce the back binding.


.... I applied glue to the back of the binding, or spine...


...then I added the chipboard piece and then I let that dry for 1/2 hour.


STEP 6: While waiting for the spine to dry,  I took my second piece of paper and trimmed it down to fit into my printer. (8 1/2" x 11")...


... after deciding on a title for my 'book', I ran it through my printer, ...


... then I cut it down for the outside cover of the book...


...making sure to cut the paper a little bit bigger than the actual book size... (I trimmed mine a little too much on the left & right..I should have left a little more for folding inside.)


STEP 7: Apply glue to the outside of the book; the front, back and spine. (The extra, over-lapping paper will be folded over into the inside once the outside has dried.) Once that dries...


... glue the over-lapping paper to the inside of the book.


Ta-Da! All done! Now comes the fun part of adding your pictures to the inside! Mine will be filled with pictures of our family members, with their names, to help my grand-daughter to learn who's who in our family!