Showing posts with label homemade. Show all posts

Thursday, August 30, 2012

Homemade Ricotta!

In July, my oldest daughter & I signed up for an online cheese-making class that would begin in August. (We were both so excited because we had been talking about making cheese for years. My daughter had made homemade buttermilk countless times for cooking, and we had heard about kindergarten classes 'shaking' their way to homemade butter (which we have not tried) but still we held back.

Fast forward a few years... One day my oldest son & his wife took my husband & I to dinner where this Italian restaurant featured their fresh, in-house, homemade mozzarella. (I had never heard of such a thing.) It was delicious! I was hooked! I was determined to make homemade cheese. If they could do it, so could we!

I'm sorry to say over a year passed since that dinner with our son. Then my daughter, Laurel, happened across this online cheese-making course. She loves all things relating to food, and even has an awesome food blog called California Laurel. It was while she was getting her daily 'fix'...(reading other folks recipes/blogs/etc.) that she came across this. Another blogger mentioned something about cheese-making. She discovered Cheesepalooza. It was, and I quote from her blog, a 'world-wide cheese-making class that would take place over the internet. Each month a new cheese would be attempted by the participants.' She told me about it & said she was signing up..."You want me to sign you up, too. Right?".  I didn't have all the details yet, but if I was going to learn how to make cheese by the time this was all over,... I'm in!

Our 'classroom' textbook & most
 recent love...

After signing up, the first thing we needed to do was buy our textbook: a beautiful cheese-making book written by Mary Karlin that I would have bought just to look through & drool over the photos! It's a beautiful book and the information in it is absolutely fantastic!


Next, I started reading the book itself, trying to understand a little more about the mysteries of cheese-making. Laurel had already gone ahead & made her first cheese, Ricotta, and posted some awesome recipe uses on her blog, including Baci di Ricotta, pictured here......


Baci di Ricotta photo property of CaliforniaLaurelblogspot.com
Baci di Ricotta, an Italian doughnut made mostly of deep-fried Ricotta
sprinkled with powdered sugar. Recipe here...

......and my favorite, a delicious & refreshing concoction that she didn't even bother to name but includes fresh slices of peach, pecans, fresh chopped basil all atop a piece of bread with a smidge of honey drizzled over the top. It was delicious! (Pictured below)

Fresh Ricotta Appetizer photo property of CalifornaiLaurel.blogspot.com
The complete recipe for this tempting dish can be found at California Laurel.

Almost waiting until the end of the month, for fear I hadn't yet read all I needed to read or would bungle this up somehow, I finally attempted to make my cheese....

I started yesterday, a bit late in the day. I was so nervous. I had thought about making cheese so often. I really wanted this to work out well, knowing that I am one of those people who gets defeated a little too quickly. Especially with something as daunting as cheese-making! But, in the end, all went well and I'm ready to start September's recipe! But first things first... let's make some Ricotta!

I found my citric acid in the canning section of my grocery store.
Ingredients:

1 gallon pasteurized whole cow's milk
1/2 cup heavy cream
1& 1/2 teaspoon citric acid powder
2 teaspoon kosher salt (Non-iodized), divided


Combine all ingredients into pot, except 1 teaspoon salt. Whisk to combine.
STEP 1: Heat the milk, heavy cream, citric acid and only 1 teaspoon of the salt in a non-reactive stock pot, on medium-low heat. Whisk thoroughly...

Use a rubber spatula to stir. Here I was just curious about how the curds were doing...

Heat to 185* to 195* F. This took me about 30 minutes.


I stirred this to try and capture a photo showing the separation
 of the curds & whey on the right. Sorry, I couldn't quite capture it. 

NOTE: My thermometer stopped working during the heating! I was told by a reliable source you can just "eye it"... watch for the curds starting to form and separate from the whey and the whey will become a 'yellowish-green color and just slightly cloudy'. As soon as you've seen these signs, remove from heat....


...Cover and allow the curds to sit, undisturbed, for 10 minutes.


I folded my cheesecloth over onto itself as many times as possible,
yet leaving it large enough to cover the strainer.

STEP 2: While waiting for the curds to start forming, and to reach the desired temperature, ready your draining equipment: Place your strainer over a large bowl, or bucket large enough to catch all the whey, and your cheesecloth folded over on itself to form a nice tight weave, placed over the strainer. Don't forget your skimmer (or ladle!).


I used a ladle since I don't own a skimmer.

STEP 3: Ladle everything from the pot, into the cheesecloth-covered strainer. (Don't forget to have a pot placed under your strainer to catch all the liquid, which is the whey and can be used as a starter for more cheese or it can be used in your compost pile! Check out this website for more details: http://homesteadingthebackforty.blogspot.com/2008/05/another-whey-to-fertilize.html)


Tie up the opposite corners to make a pouch for draining the cheese.

STEP 4: Tie up the four corners of the cheesecloth, starting with the two opposite corners first.....


..... Then tie up the remaining two corners, making a nice pouch.


I used the largest wooden spoon I own as a hanger to help strain the cheese.

STEP 5: I then allowed my cheese to drain for several hours, until it reached the consistency I wanted. I waited until my cheese was done draining and added the remaining salt. Here is the finished product.....


Tasting Notes:

Appearance: A bit wetter than store-bought Ricotta; medium-sized curds.
Nose: Very subtle
Overall Taste: VERY creamy and quite delicious!
Sweet to Salty: Sweet
Mild/Robust/Pungent: Extremely mild!
Mouth Feel: Thick and creamy... reminds me of cream cheese.

STEP 6: ENJOY! Make one of the previous delicious dishes featured by California Laurel (above) or try the following dish. Refrigerate any unused Ricotta in a non-reactive, lidded container.


Sausage Stuffed Shells with Fresh Ricotta, drizzled with Marinara.
Sausage Stuffed Shells with fresh Ricotta. Recipe here.


Wednesday, August 29, 2012

Homemade Butterfinger Candy

Candy Corn and Peanut Butter
Homemade Butterfinger takes just a
few simple ingredients!

In my never-ending quest for candy recipes, I was delighted to come across this one for Butterfinger,  & knew I had to try it! (Another Pinterest find!)  It only takes a few ingredients and was actually pretty easy. I didn't use the same chocolate as the original recipe because I prefer a mix of my own.... but basically it's the same recipe.


Ingredients:

2 1/2 cups candy corns (16 oz. bag)

1 cup crunchy peanut butter

1 cup semi-sweet morsels

1 cup milk chocolate morsels

STEP 1: Melt candy corn in a glass bowl at 30 second intervals, stirring after each, until completely melted.

STEP 2: Add in peanut butter. Mix thoroughly.


Homemade Butterfinger center
The candy centers, as they cool.

  STEP 3: Pour into a prepared 8"x8" pan, lined with foil and sprayed with a non-stick cooking spray, like Pam.


Homemade Butterfinger centers cut
Cut into longer bars or just into bite-sized pieces.
STEP 4: Allow to cool to room temperature. Once cool, cut into bars or bite-size pieces. Refrigerate in a ziplock bag for 2 hours, or until cold and firm.

STEP 5: Microwave 1/2 cup semi-sweet & 1/2 cup milk chocolate morsels in a glass bowl, for 30-second intervals, until melted. Stirring after each 30 second interval.

STEP 6: Prepare your dipping area: Place a sheet of waxed paper or parchment paper on a cookie sheet. Get out your candy centers that were placed in the refrigerator. Bring your bowl of hot, melted morsels to your dipping area, along with 2 dinner forks. (Yes, dinner forks!)


just dipped chocolate covered Butterfinger candy
Just dipped Butterfinger candies...not quite dry!
STEP 7: Working quickly, drop your first candy center into the bowl of melted chocolate. Using a fork, flip the candy over to coat other side. If any candy is still exposed, use your fork to push some chocolate over the exposed areas. Obviously, any area not covered with chocolate now, won’t be covered later. I use two forks now, and once I have lifted the candy up with my right fork, I gently tap that fork on the side of the bowl to help any dripping chocolate to fall back into the bowl, and I then go to place the candy on the parchment or waxed-paper covered tray, using my left fork to help to slide it off, trying not to damage the chocolates’ surface too much. (To view photos of this method, click here.)

*This is not a professional approach to candy dipping, by any means. There are candy-dipping ‘forks’ and other useful utensils available at most craft stores. For technique, you may want to peruse some websites that have step-by-step photos or even a video. I use this method because the Internet was not around when I first started making candy! I gleaned what I could from every book, article and recipe and came up with this method, which works for me.


Open Butterfinger candy, homemade.
All finished & ready to eat!
STEP 8: Continue working until all candies are coated with chocolate. If your candy centers start to seem a bit soft, just place them back in the refrigerator, or only take a few out at a time. Again, remember to work quickly since your chocolate is easiest to work with when warm and will become harder and harder to work with as it cools down. If your chocolate does become too hard to work with, simply reheat at 30 second intervals. One or two 30-second zaps should be all that’s necessary. Once your chocolate supply seems too shallow in your bowl, use the remaining morsels, melt in microwave & continue to coat the remaining candies.

STEP 9: Let cool in refrigerator, or if you’re in a hurry, the freezer works great! Once your chocolate has set, remove from tray and place in an air-tight container. I like to place small pieces of waxed paper between each candy. I then place them back in the refrigerator. 

ENJOY!

Interested in other Homemade candy recipes? Click here to try Twix or Peppermint Patties.

Thursday, August 16, 2012

Homemade Buttermilk

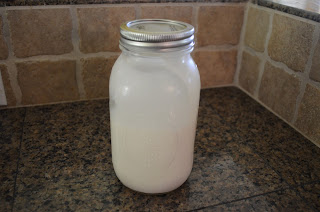
This is how my daughter stores her
Homemade Buttermilk.
Buttermilk is one of those things my family doesn't actually drink, we just need it every once in a while for a recipe. My Moms mother actually would drink a glass of buttermilk with a slice of cornbread broken into it, and stirred around together. The cornbread wasn't that 'sweet cake kind' either, as Grandma would say. There was no sugar added to this everyday staple. Not even a tablespoon! (Try it. It's nothing like what we eat now.) You think that sounds odd? She drank it while enjoying a crisp, raw onion! She would hold the onion in one hand and take bites out of it the same way we would eat an apple! Then in the other hand she held her 'glass of buttermilk', which she used to wash down her bites of onion! Hey...'don't knock it 'till ya try it'!

I must admit, I have never tried Grandmas 'snack', and more than likely, I never will. So I will never need a half gallon of buttermilk just sitting in my 'fridge. But when I do need just a cup for some homemade pancakes, let's say, the following recipe fits the bill.

Ingredients:

1 cup whole milk
1 3/4 Tbl cream of tartar or 1 Tbl white vinegar or 1 Tbl lemon juice

Add the milk with the 'acid' of your choice and stir. Allow to stand at room temperature for 15 minutes. The milk should start to curdle. Stir well before using. Refrigerate any leftovers.

From California Laurel: Red Velvet Cupcakes
with Cream Cheese frosting.


My daughter, whose buttermilk I photographed and placed at the top of the page, uses a completely different method for making her Homemade Buttermilk. You can find her recipe here on her food blog, California Laurel, as she takes you through her delicious recipe for Red Velvet Cupcakes!


*A combination of 3/4 cup plain yogurt and 1/4 cup whole milk can be used to replace 1 cup of buttermilk in most recipes. Recipe credit: http://www.mrbreakfast.com/superdisplay.asp?recipeid=1192 .

Sunday, August 12, 2012

Homemade Oatmeal Bath (like Aveeno)

Many, many folks have been buying Aveeno Oatmeal Bath over the years for all kinds of skin irritations. I'm one of those folks. Both of my sons, who are now both grown, have a terrible reaction to Poison Oak. (Just to quickly describe the extent of his allergic reaction, my oldest was in the hospital with his most recent encounter.) But when they were younger, an oatmeal bath was one of the steps we could depend upon to bring instant & soothing relief.

Needless to say, they've learned to steer clear of the offending plants, and now that they are both married,...

My younger son with his wife & daughter.
 and out of the house, 


My oldest son with his wife & son.

I no longer find it necessary to make sure we have a stash of  'Oatmeal Bath' under the bathroom sink.

Until now....

Gavin, just 2, playing with leaves this past Fall.

Meet Gavin, my third grandson. (AKA: "Pun'-kin") He is now quickly approaching his third birthday, but is not yet speaking. He was premature, which in and of itself keeps him in a continuous state of playing catch-up. His doctors, therapists & specialists all give him room for being slightly behind in certain things: size and development. But then at age 8 months he was diagnosed with Williams Syndrome. (Yet another possible size & developmental threat) All this to explain why he wasn't talking yet. So for a while there you could find him at any given time, laying on his back, wiggling around like he was dancing. We couldn't ask him what's going on. We just thought he was playing or being silly, and it actually looked pretty cute. Then we started noticing his skin. A trip to the doctor confirmed it. Eczema.

Arrgh! Yet another health concern for the little guy. Not life-threatening. Just annoying.  It pretty much makes him miserable & itchy all over. (ie...the floor dancing!) The usual advice given by doctors: keep the skin hydrated. Put lotion or cream on him constantly. Don't let the skin dry out as this adds to the itchiness, irritation & discomfort. Only problem with that is he has extremely sensitive skin, like his Mommy. Just about anything that touches the skin can cause redness, possible welts and general irritation.

Enter: Super-Grammy! (In my mind) Complete with quilted cape & horn-rimmed glasses!

Assignment: Find something for Gavins skin that is not irritating! (Something cheap, too?)

After a little bit of 'surfing' (Yes, the internet....although instead of an awesome surf-board, I may only be the embarrassed owner of a boogie-board. And instead of standing, I may be lying on my stomach, paddling with my arms...wearing my jean skirt & sandals....but you get the idea, right?) I found a few things.

Thing One: Olive Oil is the best thing for your skin. It's natural. It causes no reaction, whatsoever. It hydrates the skin. It's already in my cupboard. It isn't harmful if swallowed! The biggest bonus: Gavin absolutely loves massages! So I take some oil in a small bowl or squeeze bottle, lay Gavin on a towel (so as not to get oil on the carpet or my bedspread) wearing just his diaper, and he gets a head-to-toe Olive Oil massage! He just lays there and enjoys every minute of it. I just keep adding more oil as it gets absorbed into the skin. When that area seems slick enough, I move on to the next section. He especially loves when I do his feet & his head/neck/ear area.

Thing Two: I remembered using oatmeal bath for my sons to relieve itching... and found out it works for eczema, too! Actually it works for almost any skin irritation. Turns out that oatmeal has an anti-itch property (*avenanthramides ~ see below). This also helps with the 'need-to-itch' associated with chicken pox, poison sumac, and other itching and scratching rashes or 'itch' associated with bug bites such as mosquitoes or chiggers.

How-To Make: Use regular oatmeal from the grocery store. Just make sure it's not instant. Use your blender or food processor to grind the oats as small as possible. (You'll want a powder. To test if the grind is small enough, stir a spoonful into a glass of water, it should make the water look milky.) Store in an air-tight container. If you don't have a way to grind the oats, you can purchase oat flour. It won't be as cheap as grinding the oats yourself, but still should be much cheaper than buying the 'Oatmeal Bath' packets.

How-To Use: Add to warm bath: 1/3 cup for infants, 1 cup for adults. Soak for 15 to 20 minutes. Pat dry, don't rub!

Oatmeal baths contain 100 % Colloidal Oatmeal. The word "col·loid (k l oid) n. 1. Chemistry. a. A system in which finely divided particles, which are approximately 10 to 10,000 angstroms in size, are dispersed within a continuous medium in a manner that prevents them from being filtered easily or settled rapidly." In other words: finely ground, like powder, making the water milky. No large oatmeal pieces floating in the water. So don't be fooled into buying the Oatmeal Bath for that reason.

* Check out these two websites for all the scientific jargon related to this topic: http://pediaview.com/openpedia/Avenanthramides or   http://answers.google.com/answers/threadview/id/584277.html .

Wednesday, August 1, 2012

Seven-Grain Whole Wheat Harvest Bread

Fresh out of the oven!
My Mom always made homemade bread. It's a wonderful & lovely memory I will forever cherish. She also made the jams & jellies that went on that bread! She was pretty much incredible!

Now in case you're wondering what her reasoning was for making homemade bread (not to say that fresh, warm bread isn't good enough reason!) she didn't make it because it was 'better for you',.. this was in the early 1970's and she was just starting to read about & hear talk of white flour being bad for you and that table salt was a 'killer'.

I know she enjoyed baking, but I'm pretty sure that wasn't her sole motivation either!...she had a full-time job, 6 kids to haul around to and from school and 'after-school' activities, and a house to run! And don't forget, the 'wonders' of  Wonder bread were still mesmerizing moms all over America, convincing those same moms that since they didn't have the extra time to bake, Wonder bread make a perfectly nutritious substitute! It would have been nice if that were the answer to Moms dilemma, but the fact is, she baked her own bread because it was a way to save money. She didn't have a lot of extra time but she made homemade bread anyway! She had to save money & cut corners wherever she could, and this is just one of the many ways she did that.

I'm sorry to say I don't have my Moms bread recipe, but the recipe I'll be sharing is courtesy of "The Art & Soul of Baking" by Cindy Mushet. I've been using this recipe for the past 3 years & I really love it! It's delicious, inexpensive, nutritious and fairly easy for the return. I changed the name from 'Nine-Grain' to 'Seven-Grain' because I can never find the 9-grain hot cereal mix called for in the recipe! (I'm sure it's out there somewhere, but I go to the store around the corner from my house and just buy what's available.) I also add more whole wheat flour than the recipe calls for, & I decrease the bread flour. The changes are below:

Ingredients:

1/2 cup 7-grain hot cereal mix (not instant) I use Bob's Red Mill, found at my local grocery store
1/2 cup boiling water
1 cup plus 2 Tbl warm water (110*-115*) I just measure the water into a glass measuring cup and pop it into the microwave for 60 seconds.
This is the 7 Grain cereal I use.
1 tsp sugar
1 Tbl active dry yeast, or 2 1/4 tsp instant yeast
1/4 cup honey
2 cups bread flour
1 1/2 cups whole wheat flour
1 tsp salt

STEP 1: Make the cereal mix. Pour the cereal into a medium bowl. Add the boiling water and stir to blend. Let the mixture sit for 20 minutes.

STEP 2: Mix, rest and knead the dough. Pour the warm water into the bowl of the stand mixer. Add the sugar and yeast and whisk by hand to blend. Let sit for 10 minutes, or until the yeast is activated and foamy or bubbling. Add the cooled cereal, honey, flours and salt. Using the dough hook in the mixer, knead the dough on low speed for 2 to 3 minutes. Cover the bowl with a damp towel and let the dough rest for 20 minutes to allow it to fully hydrate before further kneading. Turn the mixer to medium-low and continue to knead until the dough is firm and elastic, 4 to 7 minutes.


STEP 3: Rise the dough. (First rise, shown below) Lightly oil a bowl, scrape the dough from the stand mixer bowl into a glass or pyrex bowl and lightly coat the surface of the dough with a little oil. Cover the bowl with a damp towel and allow the dough to rise until doubled in size, 35 to 45 minutes (longer if the room is cold).

STEP 3. This picture is blurry but I didn't notice until it was too late... I use the red dish towel & get it moist & lay it over the bowl. If it's a cold day, I set the bowl with the towel on it in the oven & set it at 200*. As soon as the oven kicks on, I shut it off. I check it a few times during the rising: check & make sure the towel is still damp & notice if the oven still seems 'warm'. If not, I turn it back on to 200* and shut it off when the gas kicks on.

STEP 4: Punch down and shape the dough.  Turn the dough out onto a lightly floured work surface. Press down on the dough firmly to expel some of the air bubbles, but don't knead the dough again or it will be too springy and difficult to shape. Shape into a round, taut loaf by pulling the sides down and under the loaf, keeping it in a circular shape. I pull the sides down and under 3 to 5 times, or until it looks pretty round. I then quickly transfer it to my baking stone that I've placed a piece of parchment on earlier. A baking pan works just as well, just remember to use parchment or cornmeal underneath the loaf.


STEP 5: Proof the dough.(Second rise, shown below). Lightly cover the dough with the dampened towel and allow to rise until it almost doubles in size. About 20 - 30 minutes.

STEP 5: Second rise. I am placing the loaf in a barely warm oven.... to get it to rise, but not bake!
After second rise.
STEP 6: Prepare the oven. Preheat the oven to 400*. Lightly sprinkle the top of the loaf with a little bit of flour. Then using a knife without serrated edges, place slash marks across the top. Don't go too deep or you'll allow too much air to escape, and your loaf will look like it has fallen before you've even been able to cook it! (See pics below on pattern for slash marks.)


STEP 6: Top picture showing slash marks in one direction... bottom picture showing slash marks in the other direction.


STEP 7: Bake the loaf. Bake for 40 minutes, or until the loaf is golden brown. Transfer to a rack and cool completely. Slice with a bread knife or a serrated knife.

Tuesday, July 31, 2012

Homemade Breakfast Sausage, Ground

Nothing better than biscuits with sausage gravy!
My family loves to eat breakfast, no matter what time of day that happens to be! I've been making breakfast for dinner since I was first married over 27 years ago.

Now this doesn't mean we don't enjoy breakfast in the morning, because we do! It's just that we would eat 'breakfast' any time of the day,.. as long as it's what my family calls 'big breakfast'.

Allow me to explain. If I served my family oatmeal for dinner, they wouldn't think that's so cool. So understand that my family will eat breakfast for dinner, IF it includes meat, potatoes, eggs and maybe some kind of bread. So 'big breakfast' to my family might be pancakes with fried potatoes and bacon on the side. Or maybe omelettes with cheddar cheese & applesauce (my husbands' favorite) with fried ham and whole wheat toast. Or how about some crispy hash browns, with 2 fluffy biscuits opened on top and smothered in sausage gravy. Maybe with a couple over-easy eggs on top for good measure. Now THAT'S what my family calls 'big breakfast'!

So when the day arrived that I discovered I could make sausage at home, I naturally tried making some breakfast sausage. I looked online and found a few recipes that looked interesting. I'm using a recipe I found on allrecipes.com, but I changed the amounts of each of the spices, making it more to my liking. I think it's delicious. Hope you agree!

Ingredients:

2 1/2 pounds pork (Buy it already ground if you have no meat grinder)
2 Tbl dried sage
2 1/2 tsp salt
1 1/4 tsp ground black pepper
1/4 + 1/8 tsp dried marjoram
2 Tbl brown sugar
1 Tbl crushed red pepper flakes
1 pinch ground cloves

If you're using unground pork, follow the directions here.

*This recipe allows for the sausage to be eaten immediately, no need to let the spices cure with the meat overnight.

Saturday, July 28, 2012

Homemade Mild Italian Sausage

My husband bought me a Kitchen-Aid Stand Mixer a few years back and for the next few special occasions, he gifted me with special attachments that don't come with the original mixer. One such gift: a meat grinder! I must admit I didn't use it right away & never actually thought of using it to make sausage.

As a child, I remember my Mom using a meat grinder that she attached to our pull-out bread board, which she had to crank by hand. She used it to grind larger cuts of meat into its' ground version for meatloaf, etc. Now since I can buy meat already ground, my meat grinder attachment gift sat unused for a while.... until I saw an online recipe by Emeril Lagasse, showcasing his homemade Mild Italian Sausage recipe. So we tried it out & I can't say enough how easy, inexpensive & rewarding it is to grind your own sausage! It's so easy I don't really feel like I'm doing any work....ya know, like 'extra credit'. (Spongebob - Season 2/Episode 10 "No Free Rides". hehe)

So, back to the sausage....

Emerils Mild Italian Sausage (http://www.foodnetwork.com/recipes/emeril-lagasse/homemade-mild-italian-sausage-recipe/index.html)

Ingredients you'll need:

3 pounds well-marbled pork butt (Buy ground pork if you don't own a meat grinder)
2 Tbl minced garlic
1 Tbl + 1 1/2 tsp paprika
1 1/2 tsp toasted fennel seeds*
1 Tbl salt
1 Tbl freshly cracked black pepper
1 tsp cayenne
1/2 tsp ground anise* (Anise is simply ground fennel seeds)
2 Tbl freshly chopped Italian parsley
3 Tbl dry red wine (I used balsalmic vinegar)
Pork casings, optional (I just bagged mine since I would use mine like ground beef.)

If your fennel seeds (found in the spice section at the supermarket) aren't toasted, simply measure what you'll need and 'place whole spices in a sauté pan, preferably non-stick, over medium-high heat and cook, stirring, until fragrant, about 5 minutes'. (This tip from Bon Appetit:  http://www.bonappetit.com/tipstools/tips/2008/04/how_to_toast_spices#ixzz21xmrNtxr)

STEP 1: Cut meat into small cubes. Combine meat and all remaining ingredients in a large bowl. Toss to coat. Cover and refrigerate overnight or up to 24 hours.

I had purchased a 13 pound Pork Loin from Costco. (Instead of Pork Butt,
which the recipe calls for)
I sliced off what would be pork chops, then cut that even smaller into cubes.
Here the meat is all cubed and ready for the spices!
I added the remaining ingredients and tossed the meat to get a good coating
 on all of it; then covered & placed in 'fridge.
STEP 2: Pass meat through meat grinder.

Always use the tool provided to push the meat down into the tube.

Here is the meat as it passes through the grinder for the first time.

If the pieces aren't small enough, pass them through the grinder a second time.


STEP 3: Time for a taste-test! Fry up a few teaspoons to check for a satisfactory flavor. (If your pork was pretty lean you may have to add a tiny bit of oil to fry the meat in.) Adjust the seasonings as desired. I thought it tasted awesome the first time and didn't change a thing!


Frying up a little for my first taste of homemade sausage!

I wrote the necessary information on my bags and scooped out some into each.

I then weighed them and either added more or took some out so that I ended up with several 1 pound packs.
I had divided my meat into three pieces before I started. I then made 1/3 Mild Italian, 1/3 Spicy Italian and 1/3 Breakfast Sausage.
*Like to try my Breakfast Sausage Recipe? click here

Thursday, June 28, 2012

Homemade Cough Drops

The idea of making my own cough drops/sore throat drops is especially appealing when I think of all the unknown ingredients that are in the cough drops available at the store. My interest is peaked even more when I think of my grandchildren, and my daughters concern over what they eat, including trying to limit their sugar intake. This is a simple solution to both concerns.

This first website lists different flavors (Herbs) of cough drops and for what use each particular herb is used. http://snappyliving.com/homemade-cough-drops/

Once you're there, they have a link (which I also added to the end of this paragraph) to a site with the actual step-by-step recipe and method. (Including lots of great photos!) http://homesteadinghomemaker.blogspot.com/2008/12/make-your-own-horehound-cough-drops.html

I can't wait to try this!

Tuesday, June 26, 2012

Homemade Waxing Supplies

For under $10.00 you can purchase enough
 supplies to last quite a long time.
Waxing at home is simple & inexpensive if you have the right equipment. Once you've got your Homemade Sugar Waxing Recipe made, you'll need just a few more items to make this a relaxing & effortless experience.

This is a basic list with no details on size or brand. I purchased the jumbo craft sticks (Above, left) at the craft store along with the popsicle sticks. (Center) The sticks on the far right are wooden coffee stirrers. You can buy these by the hundreds, if desired. The fabric is just plain muslin, purchased at the fabric store. One yard will go a LONG way! Make sure you've washed & dried the fabric once you get it home, as some fabrics have a residue on them which resembles Scotch Guard. (This inhibits the absorption you'll need from the fabric.) My small strip was cut straight, while most purchased muslin strips have an edge that resembles small teeth, which can be achieved with some pinking shears.

Now of course, you can go ahead and purchase any of these items from the beauty supply store, if desired.

Wooden sticks

Cornstarch

Muslin strips

Mild Cleanser

Baby Oil

Aloe Vera or similar product to soothe & cool

STEP 1: Use the mild cleanser first to clean the area of dirt & oils.

STEP 2: Dust a light coating of cornstarch over the area. This will help absorb any remaining oil your skin has produced, causing the wax to adhere solely to the hair, not your skin! (This really helps with the ouch! factor when the strip is pulled off.)

STEP 3: Apply warmed wax to the area with the wooden applicator of your choice. Apply the wax in the direction that the hair grows. Don't apply wax to an area any larger than your muslin strip!

STEP 4: Apply muslin strip, rubbing over the area to insure it adheres to the wax sufficiently.

STEP 5: Quickly remove muslin strip in the opposite direction of hair growth. (Rip it off! FAST!!) Repeat as necessary.

STEP 6: Once the area is free of hair, use the baby oil to remove any wax residue.

STEP 7: Use your mild cleanser once again to wash off the baby oil.

STEP 8: Apply Aloe Vera to any areas that require soothing/cooling. A cool rag works well if you have no Aloe Vera.

Monday, June 25, 2012

Homemade Sugar Scrub ~ A Sweet Treat..from head to feet!

Candy Cane Sugar Scrub on left.
Candy Cane Bath Salt on the right.
A homemade Sugar Scrub is just about the easiest homemade beauty recipe. It can take as little as two ingredients, or more if you want to add a little personality to yours.

What you'll need:

1 cup oil (Mild cooking oil, OR baby oil, OR glycerine, OR honey. All work just fine.)

1 cup sugar (Regular table sugar, not super-fine. Brown sugar works great, too)

STEP 1: Combine the two ingredients thoroughly.

STEP 2: Add 1-2 drops of essential oil, if you want a smell. Add coloring, if you want color. 

STEP 3: Scoop some sugar scrub into your hand and massage gently into your skin. Leave on for 3 to 4 minutes. Rinse off with warm water. Enjoy your soft skin!


Packaged up & ready to give!


*My first sugar scrub was made with white sugar, peppermint essential oil and red food coloring. Of course, it turned out pink. I made it as gifts at Christmas time. I called it Candy Cane Sugar Scrub. I had purchased some clear plastic containers online with white lids. I placed one jar of the Candy Cane Sugar Scrub and one jar of Candy Cane Bath Salt into a Christmas cellophane bag. I then tied it up with matching ribbon. and a tag. It's a quick & easy gift idea that doesn't break the budget!
.