Showing posts with label Easy. Show all posts

Saturday, February 8, 2014

Valentine's Day Shadow Box

My daughter made this for her husband this year for Valentine's Day....so he hasn't received it yet. She showed it to me and I thought it was so clever, I wanted to blog about it. It's inexpensive, quick, VERY personal and it also lasts all year long!!

Items needed:

~ 9x11" Shadow box

~  Scrapbook Paper of your choice

Directions:

(1) After opening shadow box and removing background piece, cut paper to size for the background. Before attaching anything permanently, fool around with the papers and embellishments to make sure you're satisfied with the final product. Decide on the size and color of the paper for the 'I love you because" banner when arranging the other items...just to make sure you love it!! You want to make sure this is the first thing your eye is drawn to when looking at the box.

My daughter used paper that looks like a love letter directly behind the banner (left), and also matted it on the red paper to make it stand out. (Good idea)  The birds (bottom right) were cut from another paper and placed in front of the striped background paper.

If you're planning to add embellishments at the front of the box (like the butterfly, top right, and the card with birds, bottom left) prepare those at this time also, rearranging everything until it looks the way you'd like.

(2) Attach all papers and embellishments. Slide the close-up embellishments between the glass and the inside lip of the frame. (They end up looking as if you slid them into the frame edge, but they are actually inside the glass where they can't be moved.) Close up box.

(3) Using an erasable-on-glass marker (Sharpie was used here. It comes off with Windex), write across the front of the glass the first "I love you because" reason... Of course, as seen in the photo, my daughter wrote "You buy me flowers". (He does buy her flowers all the time...) The beauty of this gift is that it can be erased monthly, weekly or even daily, however often you'd like, and a new 'reason' can be written..."You're a great  Daddy", "You're a hard worker", ""You pick up your own socks!"...or funny stuff that you DO appreciate: "You don't make weird noises when we have company" or "You don't lift up your shirt & scratch your belly in public"....and on and on. Have fun with this one & have a Happy Valentine's Day!!

This picture shows how the 'reason' is written across the front of the glass,
making it possible to change as frequently as desired.

Sweet....


Saturday, October 27, 2012

Homemade Foam Soap

What a quick & easy $$$ saver!!
This is so easy and quick and will save you lots of $$$$!

What you'll need:

(1) 1 new or used foam soap container (I purchased mine full of soap, used the soap, then made more!)

(2) Any liquid soap/body wash/dish soap/ baby wash, etc without moisturizers or lotions. (If you can't see through the soap, it won't work well in the pump.)

*Optional (3) Another cool option is to simply purchase clear liquid soap refill containers and add a small amount of food coloring to make the soap match the room it will go into!

STEP 1: Clean out used container.

STEP 2: Add: 2 tablespoons liquid soap of your choice & 2/3 cups water. If you're adding coloring, do it now. Just a few drops at a time.

STEP 3: Put the lid back on and gently agitate, mixing the soap with the water without creating lots of bubbles.... DON'T SHAKE!!! Or you can just use a straw or chopstick to gently mix,.. even a butter knife will work.

That's it! Enjoy your super cheap and highly color-coordinated homemade foam hand-soap! (Whew...tongue twister!)

Tuesday, August 28, 2012

Photo Tile Coasters


Photo tiles with black and white photos
Quick & easy project to give as gifts or keep for your own~

I know this idea has been around for a while, but it's my first time to try it out. My son and his wife gave us our first grand-daughter this past fall. They had also just purchased their first home. I thought it would be ideal to make them a set of tile coasters with pics of their beautiful baby girl.... to protect their new furniture. They were planning to go with black & white for a majority of the living space, with a few different shades of pale greens for a bit of color. I thought the black & white photos would look great!

Supplies:

A set of 4"x 4" white ceramic tiles.

Black & white photos cut to fit on tiles

Mod Podge, Hard Coat

Sponge paintbrush

Felt or cork to protect the bottom

STEP 1: Make sure your tiles are free of dirt or any oils. Using Mod Podge, apply the photos to the tiles, according to manufacturers instructions, being careful to center them on the tiles. Allow to dry overnight.

STEP 2: For my tiles, I was going with the black and white theme so just carried that over by painting a black line around the outside edges of each of the tiles. Once dry, I sprayed 2-3 coats of an acrylic sealer. Allow to dry between coats.

STEP 3: Hot glue a matching square of felt or cork to the bottom of each tile to protect your furniture from any possible scratches the tile might make. I chose a felt bottom.


I used some felt that went with my black and white theme...


...then I just hot-glued the felt to the underside of each tile...

Lastly, I painted the date each photo was taken on its' edge,
just because I know I'll never remember!


For another tile coaster idea using napkins, click here.

Monday, August 27, 2012

Chunky Board Book ~ Personalized

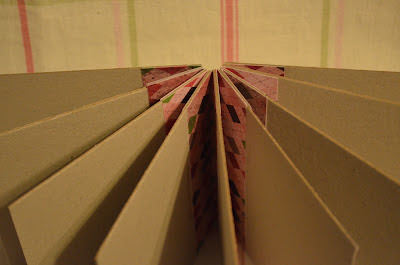
Closeup of board book binding.
Making a Chunky Board Book at home is quick & easy!
With five grandchildren around, it seems we've purchased countless numbers of board books. Some for a few coins, others a bit more pricey, but all guaranteed to bring smiles to little faces. Babies love them since they are so easy to hold and maneuver, and the brightly colored pictures can keep their attention for quite a while and have them coming back over and over just to look at the very same pictures!


Package of 30 sheets chipboard from JoAnn Fabrics.
I found this package of chipboard at JoAnn Fabrics with 30 sheets!

Supplies:  

Chipboard, for the pages.

Scrapbook Paper,  2 sheets of 12x12". One for the 'binding strips' that go between each page and one for the outside cover of the book.

Mod Podge, Matte

Square chipboard pieces, 3x3".

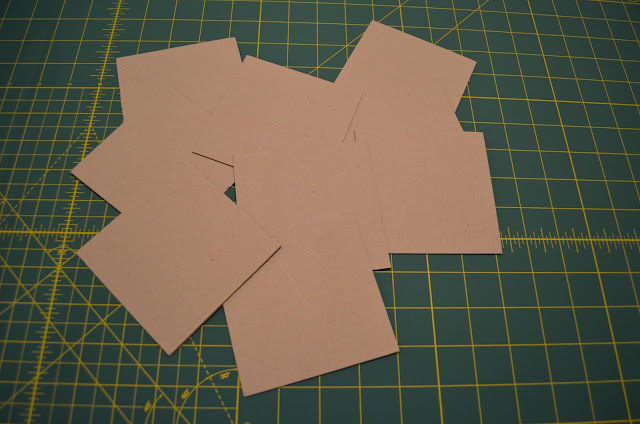
STEP 1: For the 'pages', I cut one sheet of chipboard into 9 squares, each ending up a 3"x3" square.

The first 12x12 paper I cut into 'binding' pieces.
STEP 2: I chose a piece of paper for my 'binding strips'. I cut one piece to go between each piece of chipboard. This means I needed 8 total pieces. Each piece was a strip of paper that was 3" tall and 2" wide.

I folded the pieces in half, lengthwise.
STEP 3: I folded all the 'binding strips' in half lengthwise......


..... then applied glue to only half of the strip....


...and attached this to the piece of chipboard that I planned to be my first page....


.... after about 30 seconds, I applied glue to the other half of the paper and laid the next piece of chipboard onto it, making sure it lined up. Once dry I stood it up for this photo.


STEP 4: I continued doing this with the rest of the chipboard 'pages' and paper 'binding strips'. Trim any edge pieces that hang over too far, so that you end up with a nice, clean, even edge.,,,


... then I cut the corner tips off on every page, but this isn't necessary. (I actually trimmed mine at the end, but meant to do it at this point. But either time is fine.)


STEP 5: Next I cut a 3"x1" strip of chipboard to help reinforce the back binding.


.... I applied glue to the back of the binding, or spine...


...then I added the chipboard piece and then I let that dry for 1/2 hour.


STEP 6: While waiting for the spine to dry,  I took my second piece of paper and trimmed it down to fit into my printer. (8 1/2" x 11")...


... after deciding on a title for my 'book', I ran it through my printer, ...


... then I cut it down for the outside cover of the book...


...making sure to cut the paper a little bit bigger than the actual book size... (I trimmed mine a little too much on the left & right..I should have left a little more for folding inside.)


STEP 7: Apply glue to the outside of the book; the front, back and spine. (The extra, over-lapping paper will be folded over into the inside once the outside has dried.) Once that dries...


... glue the over-lapping paper to the inside of the book.


Ta-Da! All done! Now comes the fun part of adding your pictures to the inside! Mine will be filled with pictures of our family members, with their names, to help my grand-daughter to learn who's who in our family!

Thursday, August 16, 2012

Homemade Buttermilk

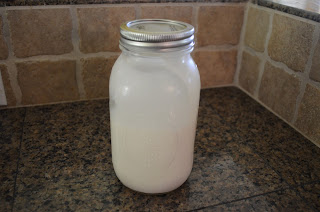
This is how my daughter stores her
Homemade Buttermilk.
Buttermilk is one of those things my family doesn't actually drink, we just need it every once in a while for a recipe. My Moms mother actually would drink a glass of buttermilk with a slice of cornbread broken into it, and stirred around together. The cornbread wasn't that 'sweet cake kind' either, as Grandma would say. There was no sugar added to this everyday staple. Not even a tablespoon! (Try it. It's nothing like what we eat now.) You think that sounds odd? She drank it while enjoying a crisp, raw onion! She would hold the onion in one hand and take bites out of it the same way we would eat an apple! Then in the other hand she held her 'glass of buttermilk', which she used to wash down her bites of onion! Hey...'don't knock it 'till ya try it'!

I must admit, I have never tried Grandmas 'snack', and more than likely, I never will. So I will never need a half gallon of buttermilk just sitting in my 'fridge. But when I do need just a cup for some homemade pancakes, let's say, the following recipe fits the bill.

Ingredients:

1 cup whole milk
1 3/4 Tbl cream of tartar or 1 Tbl white vinegar or 1 Tbl lemon juice

Add the milk with the 'acid' of your choice and stir. Allow to stand at room temperature for 15 minutes. The milk should start to curdle. Stir well before using. Refrigerate any leftovers.

From California Laurel: Red Velvet Cupcakes
with Cream Cheese frosting.


My daughter, whose buttermilk I photographed and placed at the top of the page, uses a completely different method for making her Homemade Buttermilk. You can find her recipe here on her food blog, California Laurel, as she takes you through her delicious recipe for Red Velvet Cupcakes!


*A combination of 3/4 cup plain yogurt and 1/4 cup whole milk can be used to replace 1 cup of buttermilk in most recipes. Recipe credit: http://www.mrbreakfast.com/superdisplay.asp?recipeid=1192 .

Saturday, July 28, 2012

Homemade Mild Italian Sausage

My husband bought me a Kitchen-Aid Stand Mixer a few years back and for the next few special occasions, he gifted me with special attachments that don't come with the original mixer. One such gift: a meat grinder! I must admit I didn't use it right away & never actually thought of using it to make sausage.

As a child, I remember my Mom using a meat grinder that she attached to our pull-out bread board, which she had to crank by hand. She used it to grind larger cuts of meat into its' ground version for meatloaf, etc. Now since I can buy meat already ground, my meat grinder attachment gift sat unused for a while.... until I saw an online recipe by Emeril Lagasse, showcasing his homemade Mild Italian Sausage recipe. So we tried it out & I can't say enough how easy, inexpensive & rewarding it is to grind your own sausage! It's so easy I don't really feel like I'm doing any work....ya know, like 'extra credit'. (Spongebob - Season 2/Episode 10 "No Free Rides". hehe)

So, back to the sausage....

Emerils Mild Italian Sausage (http://www.foodnetwork.com/recipes/emeril-lagasse/homemade-mild-italian-sausage-recipe/index.html)

Ingredients you'll need:

3 pounds well-marbled pork butt (Buy ground pork if you don't own a meat grinder)
2 Tbl minced garlic
1 Tbl + 1 1/2 tsp paprika
1 1/2 tsp toasted fennel seeds*
1 Tbl salt
1 Tbl freshly cracked black pepper
1 tsp cayenne
1/2 tsp ground anise* (Anise is simply ground fennel seeds)
2 Tbl freshly chopped Italian parsley
3 Tbl dry red wine (I used balsalmic vinegar)
Pork casings, optional (I just bagged mine since I would use mine like ground beef.)

If your fennel seeds (found in the spice section at the supermarket) aren't toasted, simply measure what you'll need and 'place whole spices in a sauté pan, preferably non-stick, over medium-high heat and cook, stirring, until fragrant, about 5 minutes'. (This tip from Bon Appetit:  http://www.bonappetit.com/tipstools/tips/2008/04/how_to_toast_spices#ixzz21xmrNtxr)

STEP 1: Cut meat into small cubes. Combine meat and all remaining ingredients in a large bowl. Toss to coat. Cover and refrigerate overnight or up to 24 hours.

I had purchased a 13 pound Pork Loin from Costco. (Instead of Pork Butt,
which the recipe calls for)
I sliced off what would be pork chops, then cut that even smaller into cubes.
Here the meat is all cubed and ready for the spices!
I added the remaining ingredients and tossed the meat to get a good coating
 on all of it; then covered & placed in 'fridge.
STEP 2: Pass meat through meat grinder.

Always use the tool provided to push the meat down into the tube.

Here is the meat as it passes through the grinder for the first time.

If the pieces aren't small enough, pass them through the grinder a second time.


STEP 3: Time for a taste-test! Fry up a few teaspoons to check for a satisfactory flavor. (If your pork was pretty lean you may have to add a tiny bit of oil to fry the meat in.) Adjust the seasonings as desired. I thought it tasted awesome the first time and didn't change a thing!


Frying up a little for my first taste of homemade sausage!

I wrote the necessary information on my bags and scooped out some into each.

I then weighed them and either added more or took some out so that I ended up with several 1 pound packs.
I had divided my meat into three pieces before I started. I then made 1/3 Mild Italian, 1/3 Spicy Italian and 1/3 Breakfast Sausage.
*Like to try my Breakfast Sausage Recipe? click here

Tuesday, July 10, 2012

'Acorn' Treats!

The finished 'acorns'..with a few peanut butter smears!
Fall is so full of fun & interesting crafting ideas for children... it's hard to decide which to do!      (Pinterest)  We opted for a quick, easy, edible idea that was also educational! (We went outdoors & rummaged around for different leaves, trying to choose a variety of shapes & colors....and of course, we found oak! Ps..these leaves were saved for yet another fall project!)

So we tied in the oak with the acorn, and had lots of fun producing our own little 'acorns'! The only problem we encountered was that I had to ask my grandsons to stop eating them so I could have more than one finished 'acorn' in the bowl at a time! (Pictures!!) 

What you'll need:

Nutter-Butter Peanut Butter Cookies, round - 1 pkg

Hershey Kisses, Milk or Dark Chocolate - 1 bag

Chocolate Chips - Appx. 20 - 30


STEP 1: Grammy shows them what to do: Twist the cookie as you pull apart, ending up with two pieces.


'Peanut butter & chocolate' is an irresistible combination!


STEP 2: Using the cream filling as glue, just squish on a Hershey Kiss.
  

STEP 3: Using a tiny bit of the cream filling, add a chocolate chip to the top.


That's it! We're done!    Yum!!


Looks pretty in the bowl...


Don't mind if I do!...